Easy Peasy Picnic Recipes
By Zoë (they/she) who loves a summer picnic just as long as the wasps stay away!
Been invited to a picnic, but don’t rate yourself as a masterchef in the kitchen? No worries. Give these super easy summer recipes a go, and don’t forget to tag @ncs in your pictures to show us how your picnic went down!
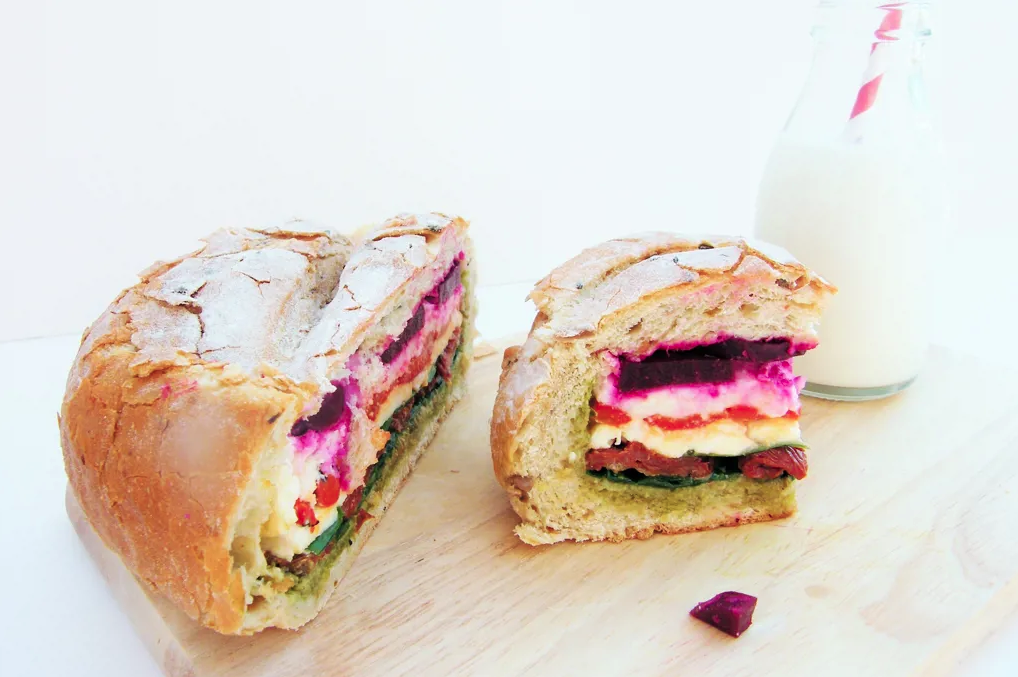
Picnic recipe: Stuffed loaf
The classic sandwich, but make it aesthetic. Try and make this the day before your picnic, as it needs to be left in the fridge overnight. Feel free to stick to the ingredients below, or swap them out for your own favourites. The only important thing is to choose a round loaf (rather than a standard rectangle one) as that makes all the difference.

Ingredients
1 round loaf of bread
2 balls of mozzarella
1 pack of cooked beetroot
3 grated carrots
3 tablespoons of pesto
2 big handfuls of spinach leaves
1 handful of basil leaves
10 cherry tomatoes
Clingfilm to wrap the loaf overnight
Instructions
1. Slice the round loaf in half and, using your fingers, remove most of the bread from the inside.
2. Using a knife, spread pesto all over the inside of the loaf. Then layer up the rest of your ingredients. To make it look like a multi-coloured rainbow delight, do one layer of soft white mozzarella, followed by a layer of cooked purple beetroot, a layer of grated orange carrot, then add the green spinach and basil. Finish it off with a layer of red cherry tomatoes.
3. Make sure both halves of the loaf are full up with ingredients — depending on the size of your loaf you might need to add more layers.
4. Wrap each half of the loaf tightly in clingfilm. Then place them in the fridge and leave them there overnight, with something on top to weigh them down (a plate or breadboard will do fine).
5. In the morning, remove the clingfilm. Both halves of the loaf should now be compact and easy to slice up into individual sandwiches. You might want to wrap each individual slice in clingfilm so it’s easy to transport to the picnic!
Picnic recipe: The ultimate crisp sandwich
From fancy multi-coloured layered sandwiches to something a bit less time-consuming, but equally delicious. Now some people might call a crisp sandwich the ‘lazy option’. But honestly, those people don’t know what they’re talking about. OK, maybe it might be a little lazy if you only include one type of crisp. But the key here is to layer up different types — your cheese & onion ones, the sweet chilli, the hand-baked salty ones — until there’s the perfect amount of crunch when you bite through it.
Ingredients
White bread, sliced
A variety of crisps of your choice
Iceberg lettuce
Cheddar cheese
Mayonnaise or condiments of your choice
Instructions
1. Take a slice of bread, splodge on a good amount of mayo, then add a couple of slices of cheese and some fresh iceberg lettuce.
2. Next, layer up the different varieties of crisp. Once there’s a good amount, top them off with some extra lettuce leaves and another slice of bread.
3. Squish the sandwich down with your hands until you hear that satisfying crunch, and you know you’ve just created a crowd-pleaser.
4. Make enough sandwiches for everyone at the picnic to enjoy.

Picnic recipe: Summer salad platter with homemade hummus
A perfect picnic needs more than just delicious sandwiches. Adding this summer platter with homemade hummus is a masterstroke! Plus, it’s inexpensive, healthy, vegan, and very easy to make.
Ingredients
1 can of chickpeas
1 clove of garlic
1 tablespoon tahini
1 lemon
1 tablespoon olive oil
1 pinch of salt
Vegetables: carrots, cucumbers, red and yellow peppers, radishes.
Instructions
1. Start by making the hummus. Pour the can of chickpeas into a colander or sieve, let the liquid drain off, and then put the chickpeas in a bowl.
2. Peel the garlic and use a knife to cut it into tiny pieces (as small as you can!). Add the garlic and one tablespoon of tahini to the chickpeas.
3. Cut a lemon in half, and squeeze some of the juice over the chickpeas (try not to let any lemon pips fall in). Then add one tablespoon of olive oil and a pinch of salt to the mixture.
4. Using a hand blender, food processor, or potato masher, mix it all up until it reaches a smooth consistency. And ta-da, you’ve just made hummus!
5. Now, for the veggies. Wash them, and then slice each one into small 1cm wide batons.
6. Put the hummus in a bowl, and have the sliced crunchy vegetables ready for people to dip into it. Don't like people double dipping? Then cut the batons small enough — around 5cm — so that one only needs to be dipped once.
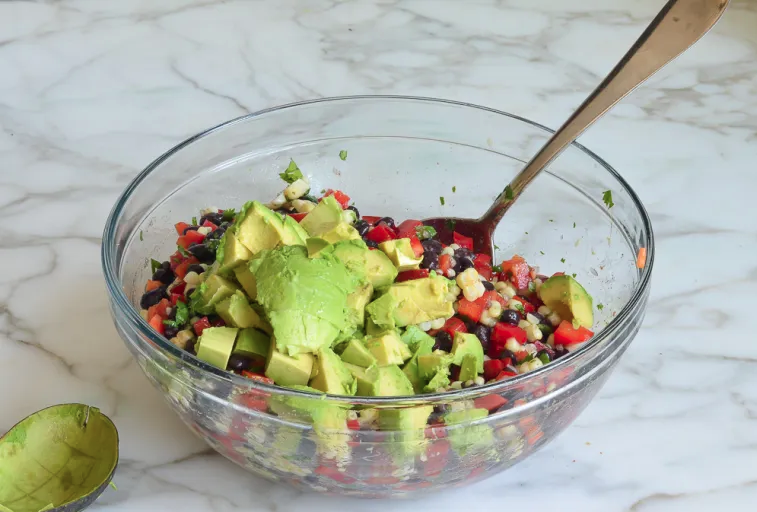
Picnic recipe: Black bean, sweetcorn, and avocado salad
This salad doesn’t need any cooking, it’s all about the chopping.
Ingredients
2 cans of black beans
2 cans of sweetcorn
2 ripe avocados
1 red pepper
1 clove of garlic
2 shallots
2 limes
1 big handful of coriander
2 teaspoons salt
2 teaspoons sugar
5 tablespoons olive oil

Instructions
1. Get chopping. Chop up the shallots as small as you can. Do the same with the clove of garlic. Chop the red pepper into 1cm chunks. Roughly chop the coriander. Then put all of it together into a big bowl.
2. Open the cans of black beans and sweetcorn. Pour them into a colander or sieve, drain off the liquid, and give the mixture a little rinse with cold water. Once most of the water has drained off, mix the beans and sweetcorn together with your shallot, garlic, red pepper and coriander.
3. Add two teaspoons each of salt and sugar, and five tablespoons of olive oil.
4. Using a knife, cut the limes in half. Squeeze out as much juice as you can and add it to the bowl.
5. Give everything a good mix together, and pop it in the fridge. You’ll notice you haven’t yet added the avocado — they need to be added at the last minute!
6. OK, whenever you’re ready to head out to the picnic, slice open your avocados, scoop out the flesh and add it to the mixture. Salad: done!
Picnic recipe: Peanut butter cookies
Every picnic needs a sweet treat, and these gluten-free cookies always go down well. If you want to, you can make them a couple of days before the picnic, as they’ll last for three days if you keep them in an airtight container.
Ingredients
200g peanut butter
175g golden caster sugar
1 pinch of salt
1 large egg
Instructions
1. Heat your oven to 180C (or gas mark 4), and line two large baking trays with baking parchment.
2. Put 200g of peanut butter and 175g of golden caster sugar into a bowl. Add a pinch of salt and mix it all together.
3. Add the egg, and mix it until it begins to look like a dough.
4. Form the mixture into small balls (about the size of a cherry tomato) and place each one onto your lined baking trays. Make sure you leave a bit of space between each ball, as the mixture will spread out while in the oven. Press each ball with the back of a fork, to flatten them a little.
5. Place the trays into the oven, and bake for 12 minutes or until the edges start to look golden.
6. Remove from the oven, and leave to cool for 10 minutes. Then move the cookies from the baking trays onto a wire rack, and leave them to cool completely.
7. Eat and enjoy!

Include this article in your Skills Builder Journal. It could help you develop... 


